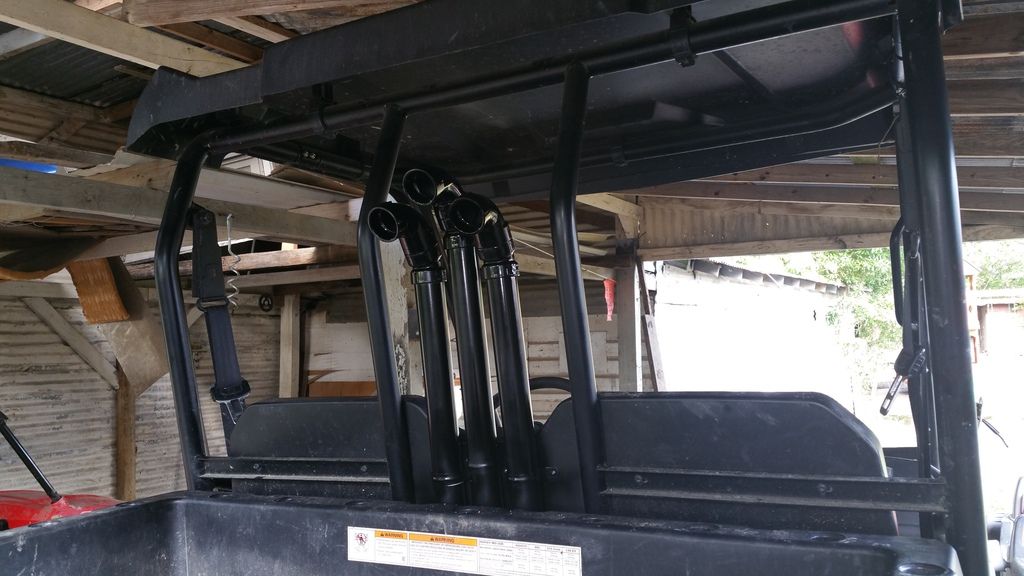
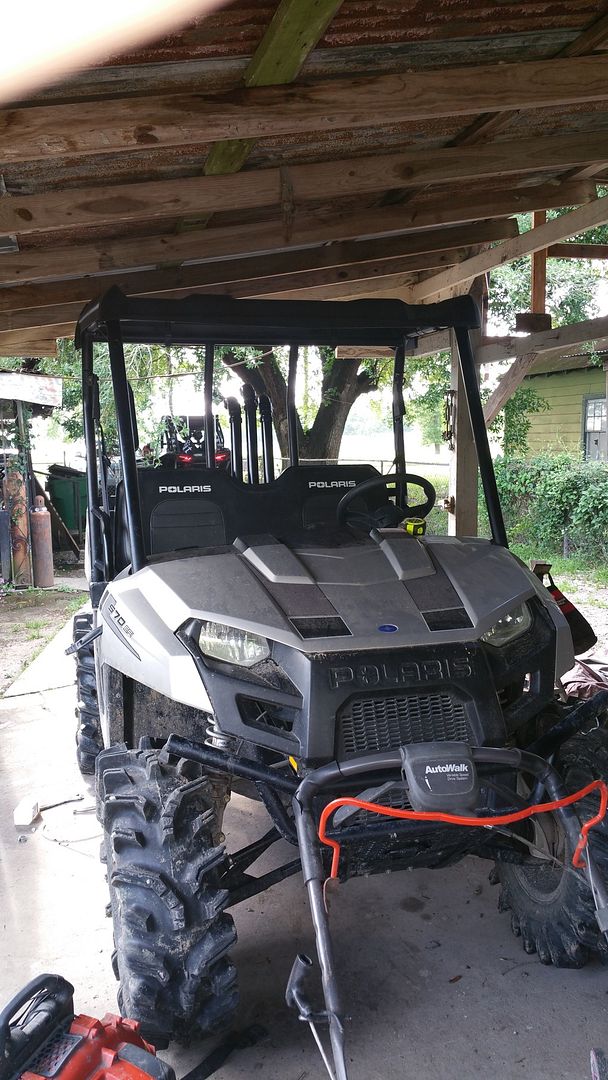
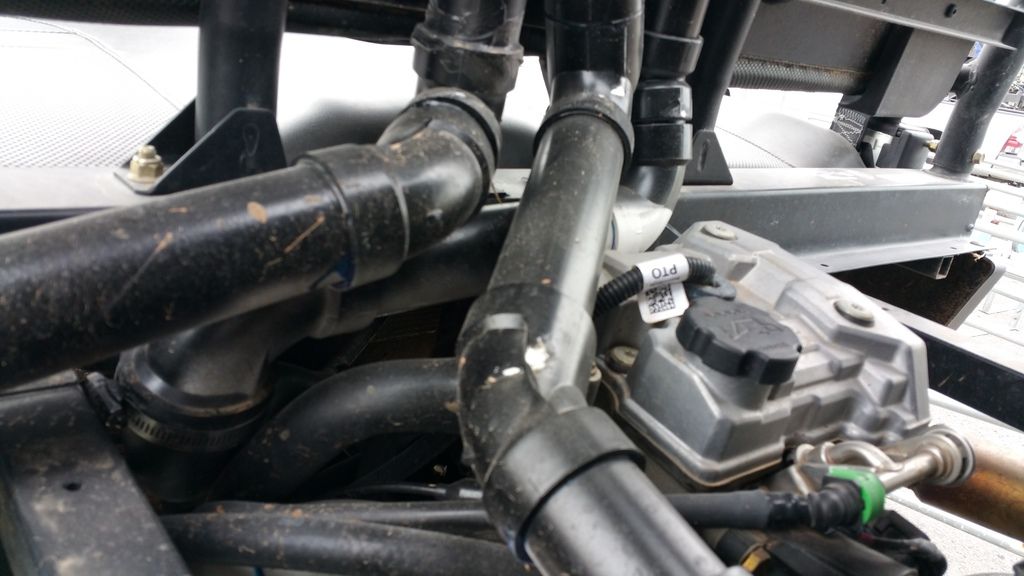
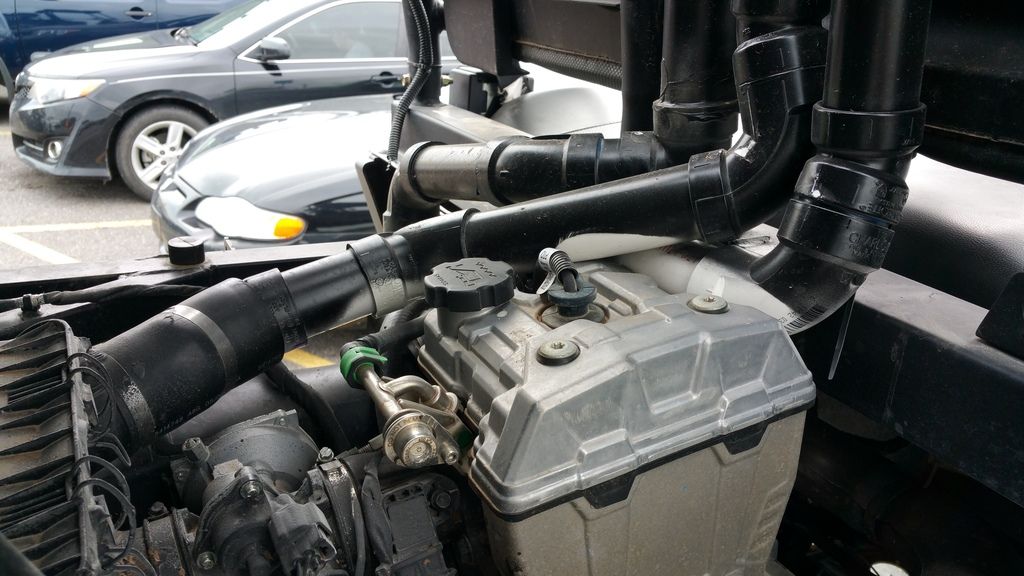
Anyone have a complete parts list and pics of there setup and are you using 1 1/2 or 2in? I've been meaning to do the 570 almost a year now and just can't bring myself to drop 350 on the triangle kit. Mud fest is in a few weekends so it's time lol. Also what are you guys doing for the diffs, vent lines, etc? Thanks for any help!

Parts list 14 570 snorkle?
sackamous
21 - 40 of 60 Posts
Joined
·
11 Posts
This is a SNORKEL YOUR ATV KIT SIDE X SIDE SNORKEL KITS BY SNORKEL YOUR ATV. $219.95 I posted this so the next person could have a good idea on how to do it and could save them a few dollars and do it on there own for half the price because it could be done easily. I just didnt have the time or feel like wasting time in LOWES like i have in the past on other atvs.
Lol that's the truth only took 3 lowes trips
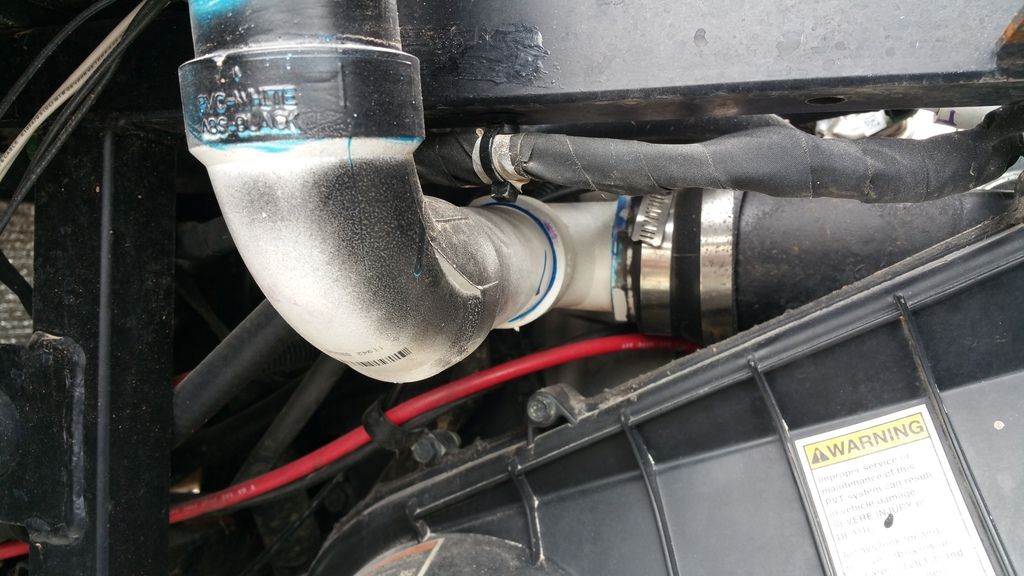
So using 1.5 inch is fine, you guys arent having any issues with it or loss of power? What are you doing with the crankcase vent? It was piped into the stock snorkle, where are you going with it now? I am working on mine for my crew now and using this thread as a guideline. Thanks 
I have had literally no problems with running 1 1/2" piping. The crankcase vent line can be done a bunch of different ways. Out air boxes have a plug on the passenger side where a crank case vent tube would normally route to so I just re-ran my line to the air box...So using 1.5 inch is fine, you guys arent having any issues with it or loss of power? What are you doing with the crankcase vent? It was piped into the stock snorkle, where are you going with it now? I am working on mine for my crew now and using this thread as a guideline. Thanks
Yeap 1 1/2 seems to be fine. I have no noticeable power loss, I done the same as Sipp. I pulled the drain plug out the air box and tied the tank vent and crank vent into it with a threaded fitting. the diffs I just took about 8ft of hose and made a bunch of loops and poined the end back down, I do plan on getting bellows for them though. Tap a fitting into the cap of the over flow bottle for the radiator and do the same with it and some hose instead of just leaving the pin hole. That's how my triangle kit had me do the rzr 1k so I figured I better do it to the ranger also.
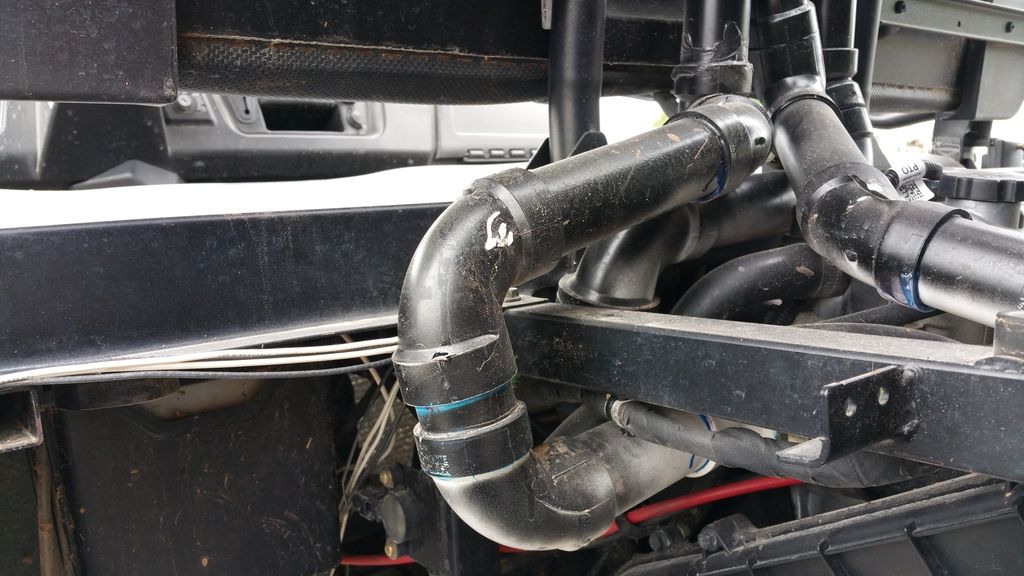
You need more then just a 90 on top of the snorkel. I stuck 90s on top of mine the first night I left it out (wasn't complete) but the belt housing was tied in and it rained, the belt box was full of water when I opened it. Glad I didn't have the intake tied in. I put 23 deg fittings then 90s on top of mine cause I had some leftover. 45s then 90s like on the snorkel your atv kit will work even better. and it looks good also.
I recommend silicone the air box lid closing it and letting it dry, Then take your finger and go around the outside and make sure the entire seam of the lid is filled with silicone just to be sure. I also put a layer around where the rubber boot ties the intake into the air box. Cover the threads of the fitting with silicone that you put into the drain plug hole. (Just as a not I run a 3/4in drill bit threw mine to make it the right size and a 1/2NPT fitting will screw in good and tight and seal up nice) I was a really to snorkel. Oh for the belt intake glue a fitting on a peace of 1 1/2 and the fitting will clamp nicely into the belt intake. For the belt exhaust I used a rubber 3x2 sweadge. The exhaust is held together in the middle by a lil rubber seam. I seaperated the seam so I could move it back some. I took the 3x2 and cut it down to just the cone for the 3in (right at the top where it stops getting bigger and flattens out for the 3in pipe) if you leave it hole the 3in side is to big to clamp right on the exhaust and its too long. This lets the cone slide back onto the belt exhaust till its the right size and a hose clamp tightnes it up nicely. Ill get a few more pics of mine with bed up if you want to see it.
Joined
·
6,273 Posts
Good idea - often overlooked!!. Tap a fitting into the cap of the over flow bottle for the radiator and do the same with it and some hose instead of just leaving the pin hole. That's how my triangle kit had me do the rzr 1k so I figured I better do it to the ranger also.
Pics speak a thousand words, that would be awesome, think i have the intake figure out now, gotta work on the clutch and exhaust, a pic of how you cut the box would be great also. Thanks 
Also how did you seperate the piece off the belt exhaust, i tried to twist it and pull, but it wouldnt budge
Get some pics in a few mins.
It's just glued together. I had started cutting mine with a rzr knife about where I wanted it when it just kinda fell apart.
It's just glued together. I had started cutting mine with a rzr knife about where I wanted it when it just kinda fell apart.
Joined
·
1,565 Posts
Didn't read the post huh Rowe doo...
1 1/2 is plenty air flow. That size pipe is very over kill for one of these Lil buggys, and while I'm sure that many risers looks cool on top it's just a lot of potential leak points when the shit goes down if you know what mean lol.
1 1/2 is plenty air flow. That size pipe is very over kill for one of these Lil buggys, and while I'm sure that many risers looks cool on top it's just a lot of potential leak points when the shit goes down if you know what mean lol.
Joined
·
1,565 Posts
It's all about the stuff going down hill LOL.Didn't read the post huh Rowe doo...
1 1/2 is plenty air flow. That size pipe is very over kill for one of these Lil buggys, and while I'm sure that many risers looks cool on top it's just a lot of potential leak points when the shit goes down if you know what mean lol.
Unfortunately my cvt exhaust seems to be glued at the joint, gotta cut it off, i pulled and twisted and it wont budge
I had started cutting mine off cause I had wanted to clamp around the Lil lip. About halfway threw the glue joint broke
Joined
·
642 Posts
If possible could you get some pics of where you hook the snorkles to the clutch, intake and exhaust? Also how you notched the box? Didnt have time to get mine done this weekend, but i have the air intake figured outnow.
I have the solid poly cab on mine. Is there a way to use the snorkle with the back panel on?
The intake is easy just unhook the stock rubber hose from the square bar and clamp it to a fitting on a piece of 1 1/2. Everyone seems to have run them slightly different.
On cutting the " box" I'm assuming you mean the bed? I just cut mine I think 3 1/2 maybe 4 in up and the width of the center bars behind the seat since that'd where the snorkle ends up. There is a lot more room under the bed then it seems. My belt exhaust snorkle actually runs between the inside wall of the bed and outside wall of the box. I'll try and get a pic with it down.
If you have trouble routing hard pipe find a pool place and get some glue-able flex pvc spa hose I think it's called. That's what most of the triangle kits are done with. Hard pipe is easier if you put it all together mark how it lines up. Then glue it.
Where do you live? If somewhere in south la I can give you a hand with it.
Depends on how it's made clint. Mine are clamped to the back plastic of the seat. Where does the cab actually sit?
21 - 40 of 60 Posts
-
?
-
?
-
?
-
?
-
?
-
?
-
?
-
?
-
?
-
?
-
?
-
?
-
?
-
?
-
?
-
?
-
?
-
?
-
?
-
?
- posts
- 714K
- members
- 55K
- Since
- 2007
PRCforum is the best Polaris forum community to discuss RZR 1000, Crew 900, PRC Ranger Club, XP 900, RZR XP 4 900, RZR 570, HD, 170, RZR-S, XP 900, RZR XP 4 900, ORV, side by side, SSW and off-road information.

